heph
New member
I taught myself to mine a week or so ago, and there's very few proper walklthroughs. People expect you to already have the knowledge and they simply throw node addresses at you and say "hyg, start mining". So... for the beginners:
Setting up a Darkcoin Miner
Step #1: Download a Darkcoin Wallet

Step # 2: Download and Install a mining program (you can run both at the same time if you like)
Step #3: Set up wallet and create a "Receiving" Address

Step #4: Set up mining programs

6. Double click the "filenameofyourchoice.bat" file.... it should begin mining

6. Double click the "filenameofyourchoice.bat" file.... it should begin mining

Step #5: Profit!
Here is what successful mining looks like:

The top is CPU Mining, The bottom is GPU Mining.
More resources:
Setting up a Darkcoin Miner
Step #1: Download a Darkcoin Wallet
- Win: http://darkcoin.io/downloads/darkcoin-qt.exe - save to a folder of your choosing
- Open your wallet and let it synconize (the bottom will show the progress)
Step # 2: Download and Install a mining program (you can run both at the same time if you like)
- Win CPU Miner - http://download.darkcoin.fr/darkCoin-cpuminer-1.3-avx-aes-windows-binaries.zip
- Win GPU Miner - https://mega.co.nz/#!XAYgiDbT!8dQtGr2H5C5JKbH9ljUn7oHzB9ij3If7HFCKmSEFw48 (this is the sph version of spminer, the miner available on the darkcoin.io page would not run properly for me)
Step #3: Set up wallet and create a "Receiving" Address
- Open your synchronized wallet and encrypt it: Settings -> Encrypt Wallet
- Once Encrypted create a receiving address for each miner you will use (ie one for CPU and one for GPU if you want to mine with both). To do this click on the "Receiving" tab. There should be one receiving address already, you can add more by clicking the "+ New Address" button in the bottom left
- You will use the receiving address as your "username" when you create your .bat files in step #4.
Step #4: Set up mining programs
CPU Miner:
1. Extract your CPU Miner to a folder of your choice
2. Read the "ReadMe" file and identify which version you will use based on your processor.
3. Pick a node to mine from, from this list: http://darckcoin.mine.nu/ (choose one with low latency)
4. Set up your execute file... open notepad and use the following:
Code:
programidentifiedfromreadme.exe -a X11 stratum+tcp://nodeofchoiceURL -u yourreceivingaddresshere -p x --quietExample:
Code:
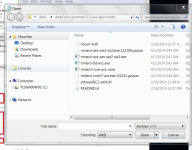
minerd-corei7-avx.exe -a X11 -o stratum+tcp://213.229.88.102:7903 -u XfyWeaucC3pFdcbxEGCn1yUyhRezXeKFEv -p x --quiet5. Save the file as "filenameofyourchoice.bat" it's important that you save it as a .bat file and not a .txt file. In the "Save as" window change "Save as type" to "All Files". Then simply type "filenameofyourchoice.bat" for the "file name" and save it in the same folder as your CPU miner.
6. Double click the "filenameofyourchoice.bat" file.... it should begin mining
For reference: "-u" is "username" and "-p" is password. in this case password is not used so a simple "x" will suffice.
GPU Miner:
1. Extract your GPU Miner to a folder of your choice
2. Pick TWO nodes to mine from, from this list: http://darckcoin.mine.nu/ (choose two with low latency)
4. Set up your execute file... open notepad and use the following:
1. Extract your GPU Miner to a folder of your choice
2. Pick TWO nodes to mine from, from this list: http://darckcoin.mine.nu/ (choose two with low latency)
4. Set up your execute file... open notepad and use the following:
Code:
setx GPU_MAX_ALLOC_PERCENT 100

setx GPU_USE_SYNC_OBJECTS 1

sgminer.exe -k darkcoin -o stratum+tcp://FIRSTnodeofchoiceURL-u yourreceivingaddresshere -p x --failover-only -o stratum+tcp://SecondnodeofchoiceURL-u yourreceivingaddresshere -p x --xintensity 100 --gpu-threads 1 --no-submit-staleExample:
Code:
setx GPU_MAX_ALLOC_PERCENT 100
setx GPU_USE_SYNC_OBJECTS 1

sgminer.exe  -k darkcoin -o stratum+tcp://62.141.39.175:7903 -u XfyWeaucC3pFdcbxEGCn1yUyhRezXeKFEv -p x --failover-only -o stratum+tcp://213.229.88.102:7903 -u XfyWeaucC3pFdcbxEGCn1yUyhRezXeKFEv -p x --xintensity 100 --gpu-threads 2 --no-submit-stale
5. Save the file as "filenameofyourchoice.bat" it's important that you save it as a .bat file and not a .txt file. In the "Save as" window change "Save as type" to "All Files". Then simply type "filenameofyourchoice.bat" for the "file name" and save it in the same folder as your GPU miner.
6. Double click the "filenameofyourchoice.bat" file.... it should begin mining
For reference: "-u" is "username" and "-p" is password. in this case password is not used so a simple "x" will suffice.
After you get comfortable mining, read this: http://www.overclock.net/t/1461916/tutorial-ultimate-guide-to-tweaking-amd-cgminer-3-7-2-kalroth-edition-sgminer-instructions-included-aswell-get-the-most-hash-out-of-your-gpu and tweak your settings to maximize your potential. You may wish to add a .conf file for tweaking.
Step #5: Profit!
The miners will run and payments will automatically be sent to your "receiving address"/username. \o/
Here is what successful mining looks like:
The top is CPU Mining, The bottom is GPU Mining.
More resources:
http://wiki.darkcoin.fr/wiki/Accueil (Intro, in French, use Chrome)
http://wiki.darkcoin.fr/wiki/Miner_des_Darkcoins (About Mining, in French, use Chrome)
http://wiki.darkcoin.fr/wiki/Configuration_du_Minage (Config file and node info, in French, use Chrome)
https://bitcointalk.org/index.php?topic=153232.0 (why latency is important)
Guide to Overclocking cgminer (same for sgminer)
Additional Troubleshooting:http://wiki.darkcoin.fr/wiki/Miner_des_Darkcoins (About Mining, in French, use Chrome)
http://wiki.darkcoin.fr/wiki/Configuration_du_Minage (Config file and node info, in French, use Chrome)
https://bitcointalk.org/index.php?topic=153232.0 (why latency is important)
Guide to Overclocking cgminer (same for sgminer)
- If the GPU miner fails to run you may need to add the zlib1.dll file (I had to)
1. Download the zlib 1 file here: http://prdownloads.sourceforge.net/libpng/zlib123-dll.zip?download
2. Save the zlib1.dll file to the same folder as your miner (JUST THE zlib1.dll FILE, not the whole zip).
- Note: If you want to see the "per thread" speed along with the total speed of your CPU Miner, simply remove "--quiet" from the end of the string in the .bat file.2. Save the zlib1.dll file to the same folder as your miner (JUST THE zlib1.dll FILE, not the whole zip).
- Alternatively LIB1.DLL could be copied to the SYSTEM or the SYSTEM32 folders, should work the same)
Last edited by a moderator:
")